This is a new topic in 12.03.
This is a new topic in 12.04.
Content highlighted in yellow is new in 12.03.
Content highlighted in blue is new in 12.04.
Import Tools
If you have the Expenses Configurator user role, you will have access to the Tools section at the bottom of the side menu. The first three menu items within the Tools section are Expense Types, Expense Policies and Workflow Groups. These areas allow you to quickly set up a large number of expense types, expense policies or expense workflow groups by importing them via CSV. The grids on these screens contain more extensive data than the grids of the same names in the Setup section and can also be exported as CSV files.
Exporting a Data Grid
Click the three dots button  in the top-right of the grid, then click Export. This begins a download of a CSV file containing the data. When the file is ready, it will appear at the bottom of your browser.
Importing a Data Grid
CSV Format
The CSV files for each type of import should contain the following data in each column. For tick box fields, such as Amount Validation or Rate Validation, enter ‘Y’ if you want the box to be ticked, or ‘N’ if you want the box to be unticked.
Expense Types
|
Column |
Data |
|
A |
Kco |
|
B |
Name |
|
C |
Label |
|
D |
Expense Type |
|
E |
Expense Category |
|
F |
Amount Validation |
|
G |
Rate Validation |
|
H |
Units Validation |
|
I |
Rate Label |
|
J |
Odometer Controls |
|
K |
Vat Code |
|
L |
Costing Method |
|
M |
Default Non-Billable Type |
|
N |
Default Billable Type |
|
O |
Cost Distributions |
| P |
Vehicles |
Expense Policies
|
Column |
Data |
|
A |
Kco |
|
B |
Name |
|
C |
Expense Type |
|
D |
Start Date |
|
E |
End Date |
|
F |
Maximum Claim Amount |
|
G |
Maximum Claim Quantity |
|
H |
Maximum Claim Rate |
|
I |
Policy Breach Action |
|
J |
Receipt Required |
|
K |
Receipt Required For |
|
L |
Ignore Similar Claims |
|
M |
Description Required |
|
N |
Merchant Required |
|
O |
Distance Rates |
|
P |
User Defined Fields |
Workflow Groups
|
Column |
Data |
|
A |
Kco |
|
B |
Workflow Group Name |
|
C |
Effective Date |
|
D |
Approver 1 Type |
|
E |
Approver 1 Name |
|
F |
Approver 1 Limit |
|
G |
Approver 2 Type |
|
H |
Approver 2 Name |
|
I |
Approver 2 Limit |
|
J |
Approver 3 Type |
|
K |
Approver 3 Name |
|
L |
Approver 3 Limit |
|
M |
Approver 4 Type |
|
N |
Approver 4 Name |
|
O |
Approver 4 Limit |
|
P |
Approver 5 Type |
|
Q |
Approver 5 Name |
|
R |
Approver 5 Limit |
|
S |
Finance Approver 1 Type |
|
T |
Finance Approver 1 Name |
|
U |
Finance Approver 1 Limit |
|
V |
Finance Approver 2 Type |
|
W |
Finance Approver 2 Name |
|
X |
Finance Approver 2 Limit |
|
Y |
Finance Approver 3 Type |
|
Z |
Finance Approver 3 Name |
|
AA |
Finance Approver 3 Limit |
|
AB |
Finance Approver 4 Type |
|
AC |
Finance Approver 4 Name |
|
AD |
Finance Approver 4 Limit |
|
AE |
Finance Approver 5 Type |
|
AF |
Finance Approver 5 Name |
|
AG |
Finance Approver 5 Limit |
Expense Users
Username is the only mandatory field for Expense User imports.
|
Column |
Data |
|
A |
Username |
|
B |
Approval Group |
|
C |
Costing Method |
|
D |
Base Currency |
|
E |
Allow Multi Currency |
|
F |
Pay By |
|
G |
Def Remit Print |
|
H |
Bank Code |
|
I |
Bank Account |
Importing the File
The images in this section show an example of an expense types import, but the process is the same for all three options.
-
On the vertical menu, click the > button next to the type of data you wish to import, then click Import.
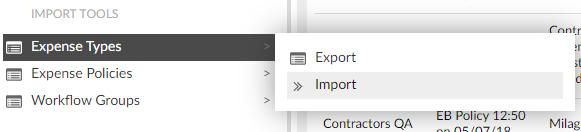
This opens the import window.
-
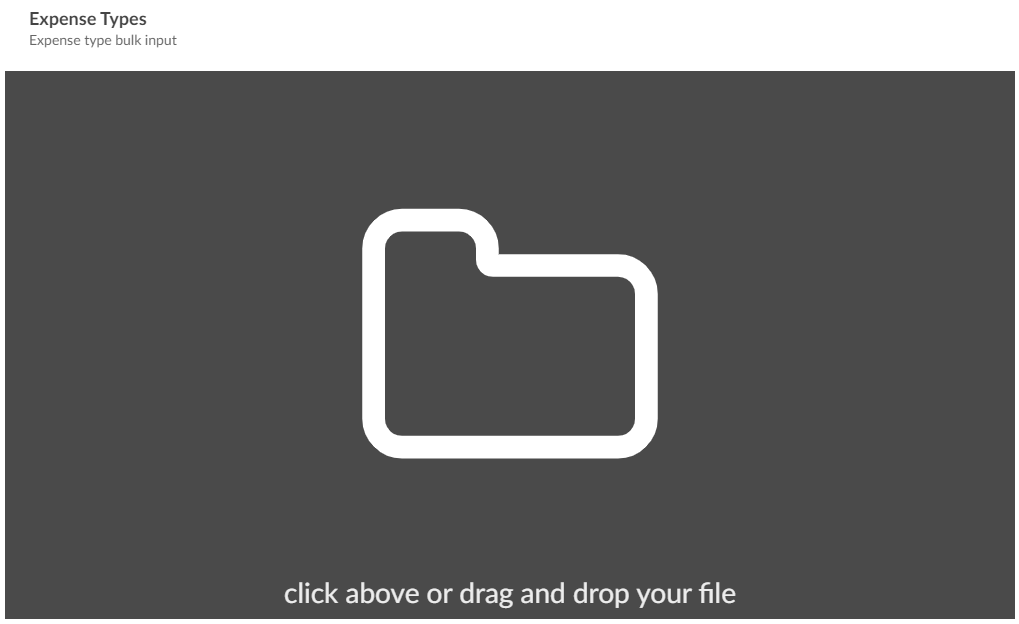
Click the dark space to open File Explorer, then find and open the CSV file. Alternatively, drag and drop the file onto the import window. The data will then appear in a grid.
-
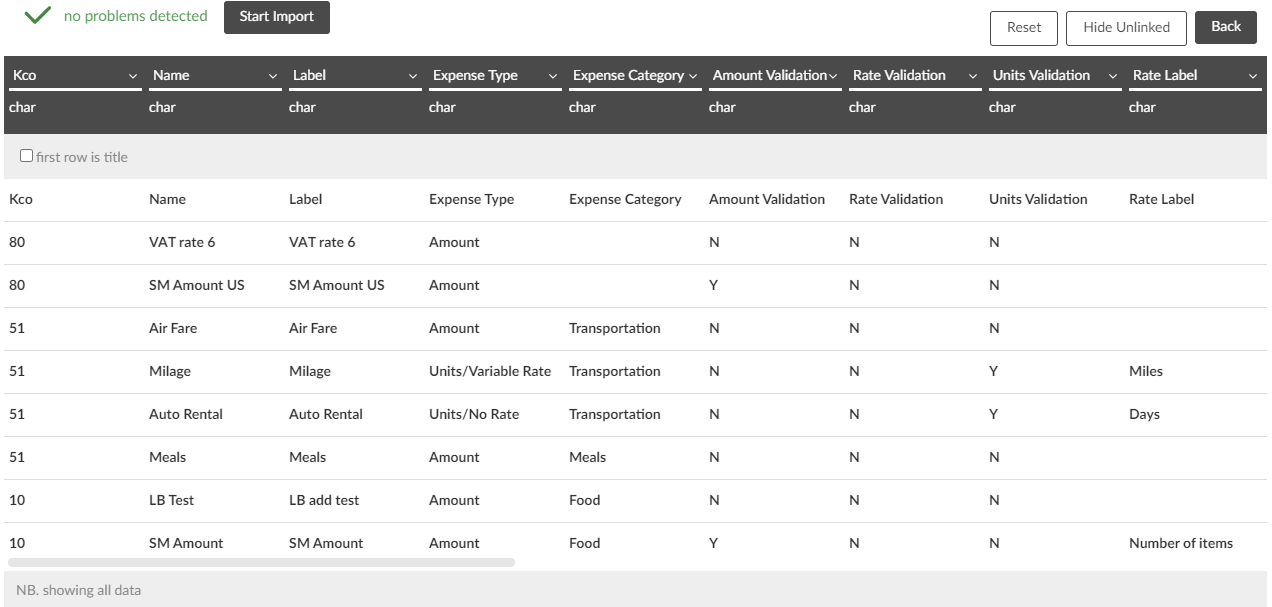
If the first row in your CSV file contains column headings, tick the “first row is title” tick box to ignore the first row of data.
-
If there are problems detected with the alignment of your data, click the
 button and the system will attempt to match the labels in your CSV to the expected columns. Click the Reset button to undo Auto Align.
 -
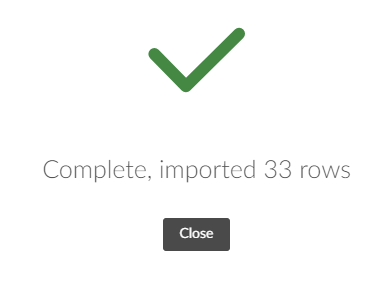
Click
 to import the CSV. If successful, you will receive a completion message with a green tick.